Probo.CI and Drop Guard work together for a better QA process
Not long ago we were talking about the value of testing your updates in feature branch instances. It’s the most efficient way of ensuring the quality of applied updates, but it’s very time-consuming.
To use this process, you are required to maintain your own infrastructure to spin up QA servers quickly, run automated tests and share the testing instance between team members. And preferably, you do it every time an update is applied for any of the modules across your websites.
Sound scary? In fact, it is (at some point). Drop Guard alone is not capable of creating virtual servers or containers of any sort. Its only mission (and where it really shines) is to provide a blazingly fast method of Drupal update detection and application while being flexible enough to integrate into any workflow and with any 3rd party tools.
The last point is particularly handy, as we can delegate the heavy lifting work to another service, and let Drop Guard talk to it so that we’re able to benefit from the extra functionality without overcomplicating the product itself.
Speaking of feature branch instances creation, our main requirements to such a service would be:
- To be able to spin up quickly isolated “preview” instances of our website out of the feature branch;
- Have an option to execute random SSH commands and run tests inside the environment;
- To integrate with major Git hosting providers;
- To know Drupal specifics and reduce the time needed to onboard Drupal or MySQL driven projects;
- To handle everything in a secure way, so that no sensitive data is exposed.
There are not many solutions like this on the market, but luckily enough there are some really great ones we can rely on in our daily routine.
Today we’ll be talking about Probo.CI - a product of Zivtech. In this practical guide, we’ll go step by step to configure Probo.CI and Drop Guard to ensure the best continuous security update and QA process for our test website.
Our goal is to configure Drop Guard to create feature branches for the security updates and pass the remaining work to Probo.CI to launch testing instances for each of the updates.
Ideally, we should end up with a full-blown quality assurance machine for Drupal updates. Excited already?
What Probo is
Probo.CI was initially created to fulfill an internal need for a proper testing workflow. It focuses equally on automated and human QA process and gives a very granular real-time view into the state of development before the work is merged into a git branch. In simple words - you can preview and test the website made out of the feature branch before this branch is even merged.
While not entirely Drupal focused, it was designed with Drupal in mind and provides excellent integration capabilities. Exactly what we need for our guide.
Let’s break our build first
Probo integrates with GitHub and Bitbucket, so to use it all you need is to create an account and enable access to the repository where the codebase is located. Travis CI or Circle CI users will find the onboarding process very familiar. For the purpose of this guide, we have connected Probo to a test repository on GitHub containing the Drupal core and a couple of outdated modules.

No builds so far, as we haven’t pushed anything to the repository.
The first task is to ensure Probo actually works and is able to work with our repository.
You should remember that Probo mostly operates “inside” a pull request (PR), so let’s go ahead and create a separate branch in our test repository, containing a configuration file named .probo.yaml with the following contents:
steps:
  - name: Test Connection
    plugin: Shell
    command: 'echo "Erroneous command'
Note the .yaml file syntax and always check it before pushing.
The next step we often do is to create a PR. After a couple of moments, we can see that our first Probo build failed!
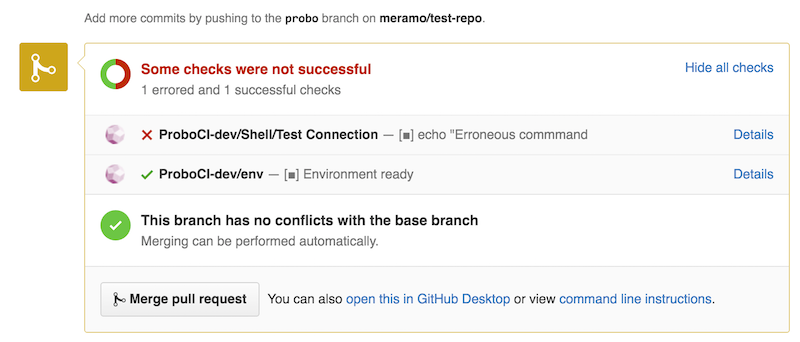
Let’s click on the “Details” link to check what went wrong exactly.

If you were following along patiently, you’ve probably noticed a syntax error in the .probo.yaml file - the SSH command line is missing the closing quotation mark. How dare we!
Visit Probo.CI documentation to check on the available plugins, integrations and extra options not covered by this guide.
Let’s fix the command, commit, push and check the same PR page.
steps:
  - name: Test Connection
    plugin: Shell
    command: 'echo "Erroneous command"'
This time, we’ve got all greens, so we can be sure that Probo works for us.
As we can see, it appears to be very handy from the very beginning. You create a pull request for the feature branch and in case some of the steps defined in Probo.CI build file fail, you get a notification immediately in the pull request interface. How cool it is!
On the screenshot above, we can see that Probo created a test environment for us, but if we follow the “Details” link and try to access the environment, we will see nothing. Why?
Simple! Our build consists of Drupal source code only, and it’s definitely missing the database.
Working with assets in Probo
For Probo to be able to spin up a website instance, the database is a must, so our next step is to create a compressed and sanitized dump of our database.
Once it’s done (with Drush or your favorite tool), go to the Build Assets page for your Probo project and upload the dump. You can do the same with the command line, but for the sake of simplicity we are doing it via the UI.
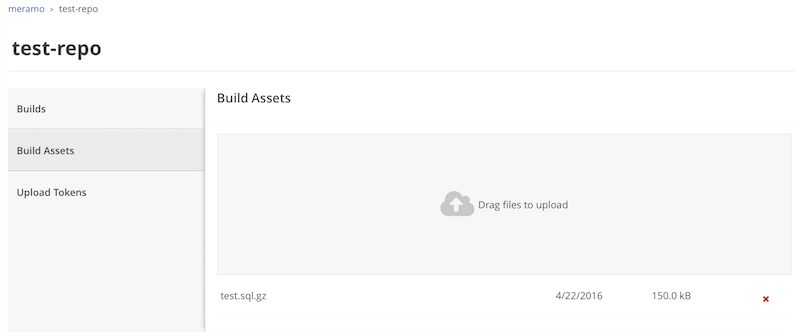
Harness the power of Drupal plugin
Remember the Shell plugin we used to test the connection? You may think our next step is to script manually the database import, settings.php file modifications and other things necessary to spin up a Drupal site, but in fact, all we need is to use Drupal plugin with a very simple syntax. It will do everything for us.
So let’s go ahead and modify our .probo.yaml with the following contents (adjust the dump name if it’s different from ours).
assets:
  - test.sql.gz
steps:
  - name: Echo out something
    plugin: Shell
    command: 'echo "Hoooray!"'
  - name: Probo CI site setup
    plugin: Drupal
    database: test.sql.gz
    databaseGzipped: true
    databaseUpdates: true
    clearCaches: true
That’s it. What remains now is to commit the file change, push a feature branch and open a pull request.
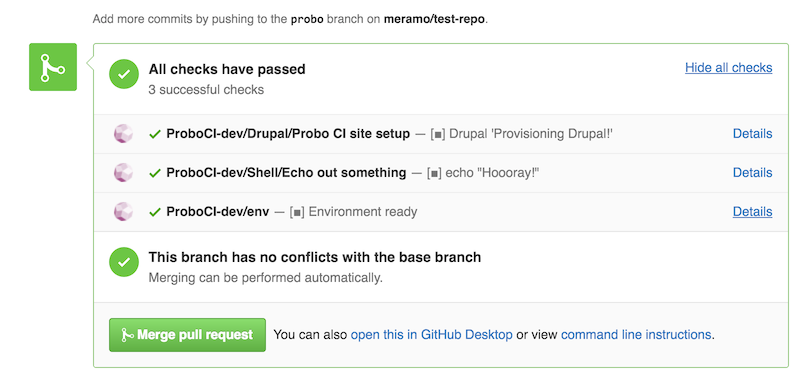
All checks passed, the environment created. Let’s follow the “Details” link and see if we managed to create the working instance.
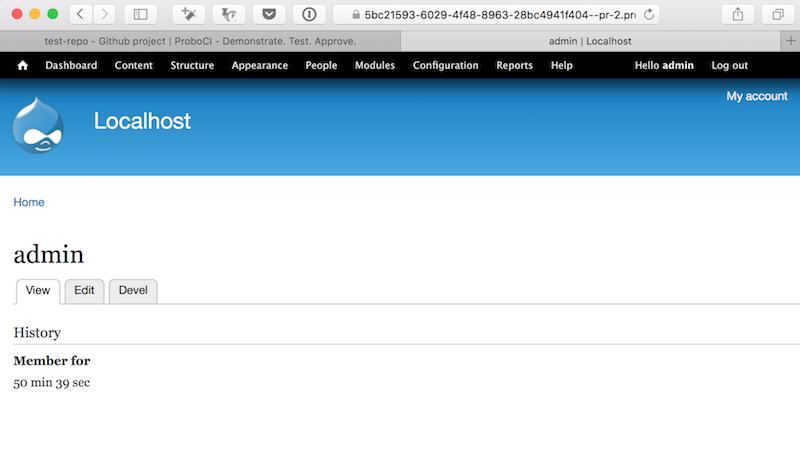
Here it is - the actual working website created just in time, directly from the feature branch. Like a blast!
Testing Drupal updates
While we’re very excited about Probo, let’s not to forget our primary goal here - to be able to spin up a feature branch instance for security updates detected by Drop Guard.
You should be familiar with basic Drop Guard concepts. If not, please check out recent blog posts and videos on the topic, and don’t forget to create an account - it’s free and takes just a few moments of your time.
Let’s connect Drop Guard to our test project, open up a project overview page and check for updates. You will see a very simple page with all the security issues and available updates listed. The project will be paused initially, as we haven’t created any update behaviors yet.

And wow - we have two Critical security issues!
Let’s configure the update behaviors for Drop Guard to create a feature branch for each of those updates.
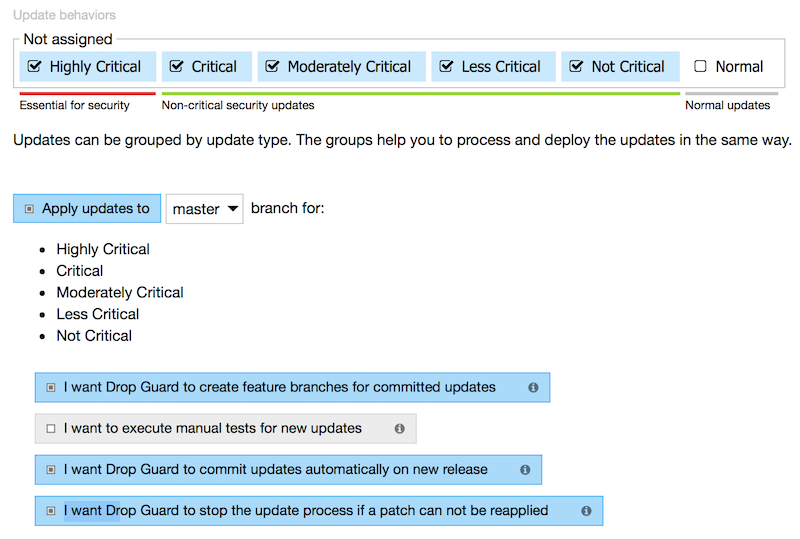
Here we are telling Drop Guard to do the following for the group of security related updates:
- Create a feature branch for the update task;
- Skip all manual tests;
- Create and process the update task right away after updates detection, without waiting for user input;
- Watch for code modifications and stop the update process in case there are any conflicts.
After playing with update behaviors a bit, let’s unpause the project and check for updates again. This time, Drop Guard will not only check for updates but also process them according to the configuration we’ve just set.
Live site deployment config
Although Drop Guard is not a full featured CI solution, it can be used for simple deployments to production. Let’s visit the project edit screen and configure the “Task is closed” event to trigger our super simple deployment action. Once the update task is closed, Drop Guard will log in to the live site server and execute a set of SSH commands.
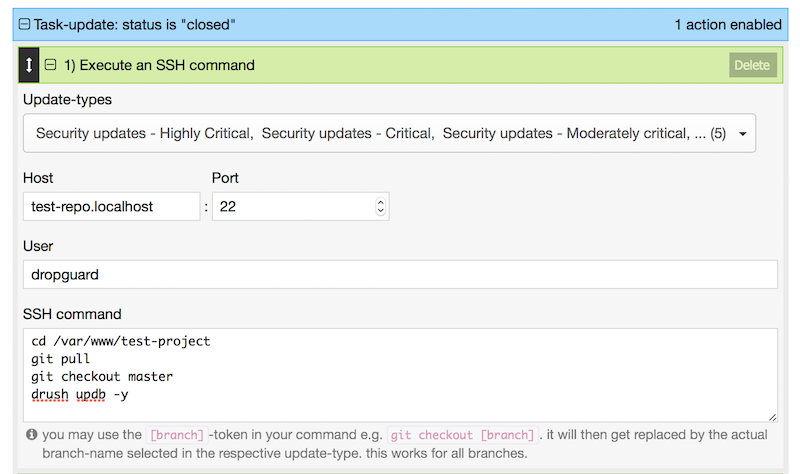
Drop Guard did the job
Going back to our Git repository, looking for commits made by Drop Guard. Here they are!

So, our critical security updates are in the feature branch. Let’s create a pull request and let Probo.CI to spin up a test instance for us.
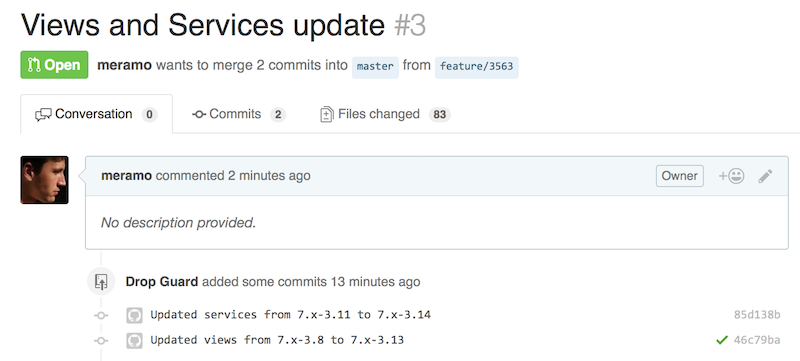
Drop Guard created two commits - one for each module. Let’s scroll to the bottom a bit and check the Probo.CI output.
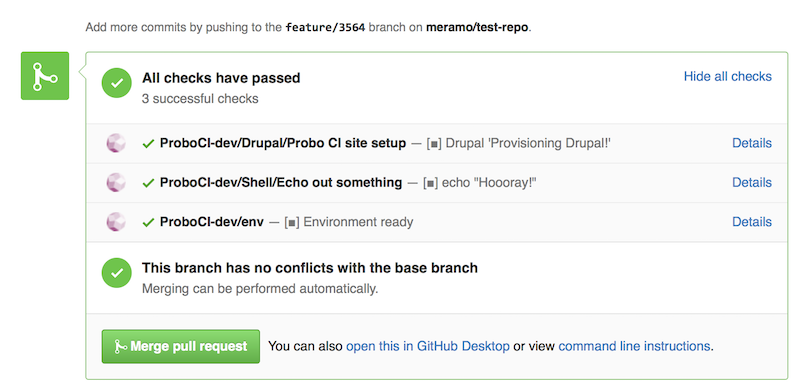
Probo.CI just made it as well
All clean. Checking the “Details” link next to the “Environment ready” message and going back to the Probo.CI interface, where we can see the details of the build creation process and the link to the test instance.
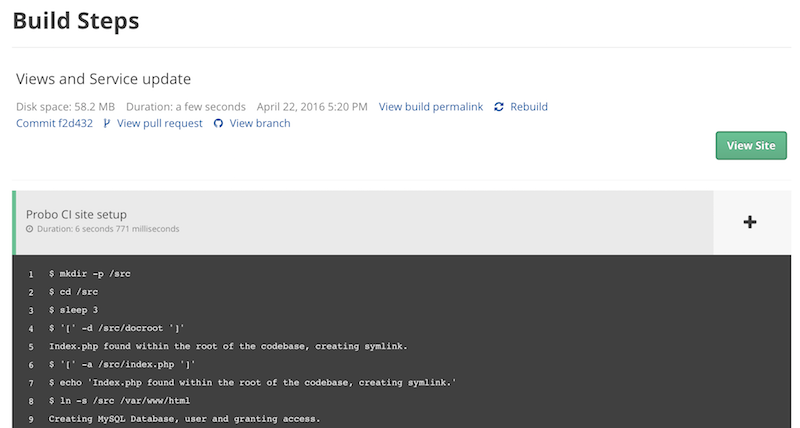
Let’s click on the “View site” link, enter login and password and check the Modules page in Drupal. As we can see, both modules, Views and Services, were successfully updated by Drop Guard, and we are now ready to do our manual and automated tests.

Merge and deploy
Once we are sure that our little test update works without issues, we are ready to merge the pull request to the production branch (although you may want to check them in the staging branch first).
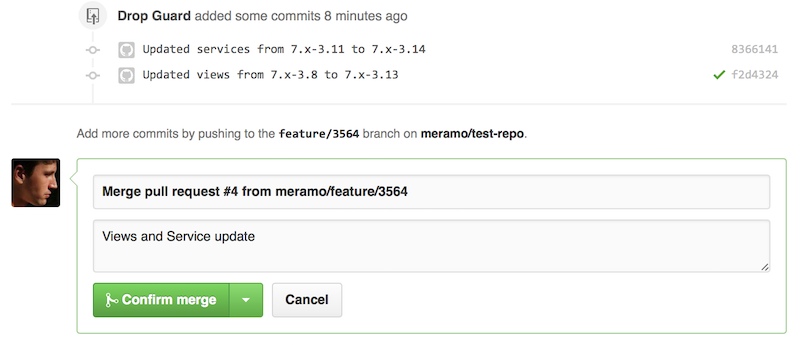
And finally - go back to Drop Guard and close the update task, which will trigger the deployment action we’ve created before.
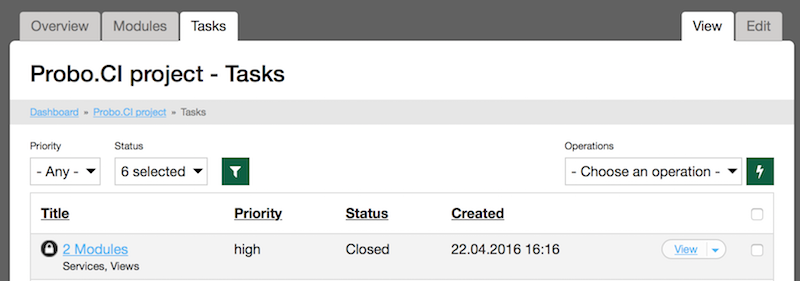
In the end - just a couple of clicks, the work is done in two browser tabs and no hassle at all! If we think about it further, this process can become even more automated, but it’s out of the scope of the article.
This post is originally written for Drop Guard’s blog and is reposted here with permission.