Setting up a WPEngine Site with Probo
As a recent addition to the Zivtech team who doesn’t come from a technical background, I’ve been exposed to a lot of new technologies and terminologies. When our CEO assigned the task of getting a WPEngine site to work with Probo, I knew it would be a challenging learning experience. With less technical expertise than many other WPEngine users, I was prepared for potential speed bumps along the way.
Through the experience, I learned that HTML, CSS, and Git can be difficult to work with when you’re a beginner. There is a significant learning curve involved with picking up these tools, especially for those completely unfamiliar with them. However, in the world of web development they are everyday tools, and it’s important to know how to navigate each one. Even with my limited knowledge, I was able to successfully set up the site, and I learned a lot in the process.
Setting up Your Site
Start by going to https://wpengine.com/git and follow the instructions to set up your site with Git, both locally and on GitHub. Make sure that you choose to backup the entire site, including the database, when you reach that step.
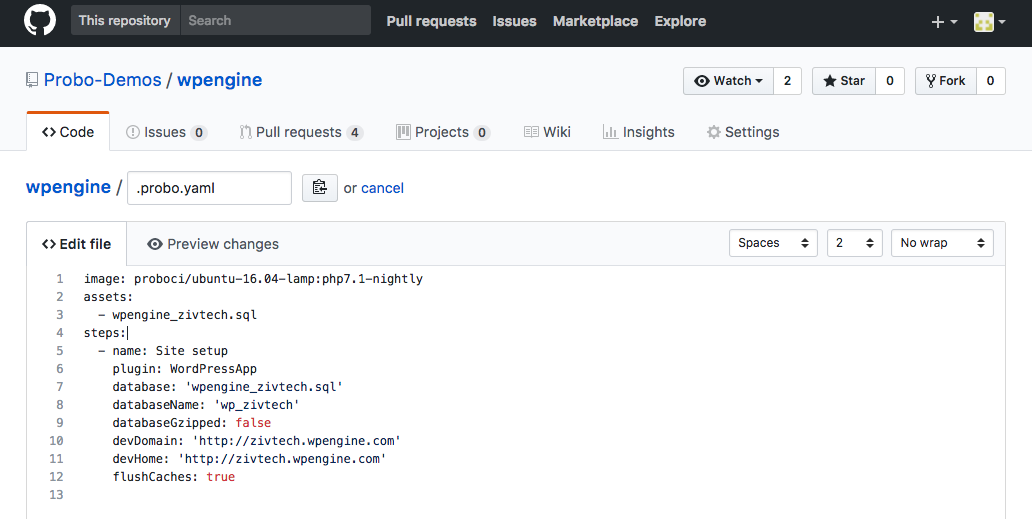
Create a file with the name .probo.yaml and add the following text:
image: proboci/ubuntu-16.04-lamp:php7.1-nightly
assets:
 - mysql.sql
steps:
  - name: Site setup
   plugin: WordPressApp
   database: 'wpengine_zivtech.sql'
   databaseName: 'wp_zivtech'
   databaseGzipped: false
   devDomain: 'http://zivtech.wpengine.com'
   devHome: 'http://zivtech.wpengine.com'
   flushCaches: true
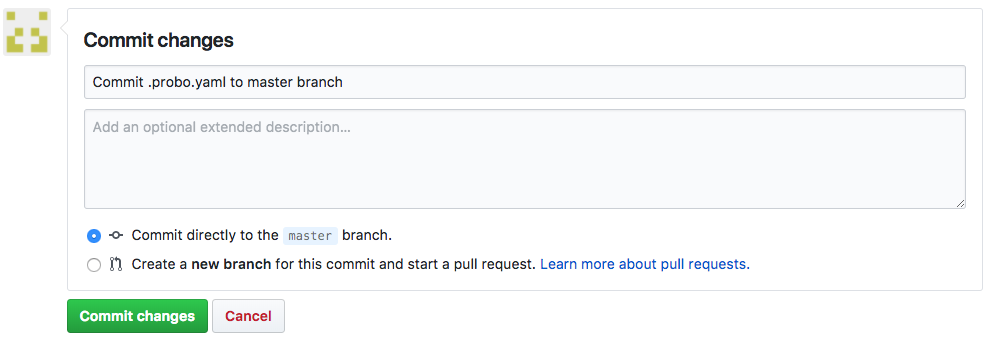
Save this file into the top-level/root folder of your repository. You can either place the file locally in the root of your WPEngine repository and push it to GitHub using Git, or simply create a file named “.probo.yaml” on GitHub, paste the text from the yaml in, and commit it to your Master branch. The images below demonstrate the latter option.
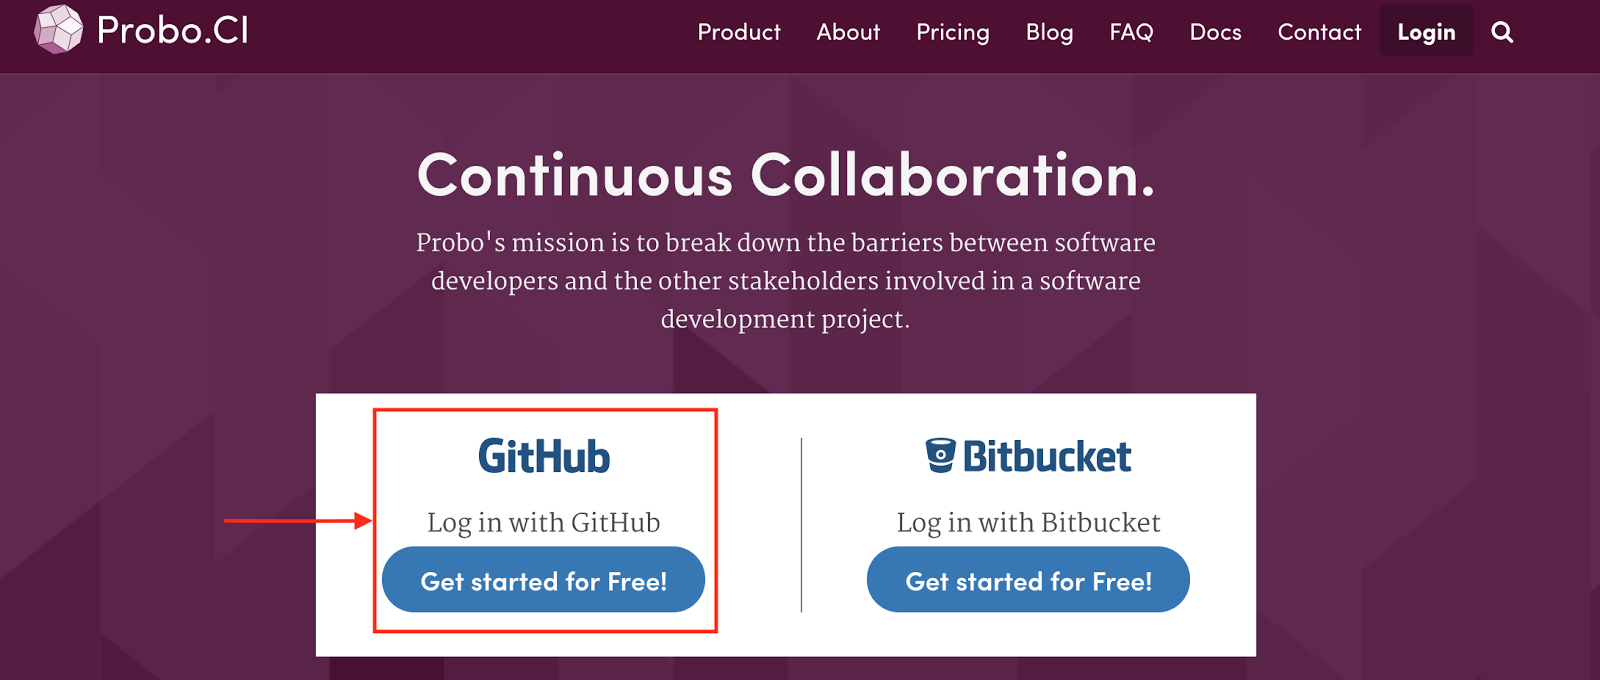
Next, sign up for Probo using your GitHub account and enable the repository for your WPEngine site.
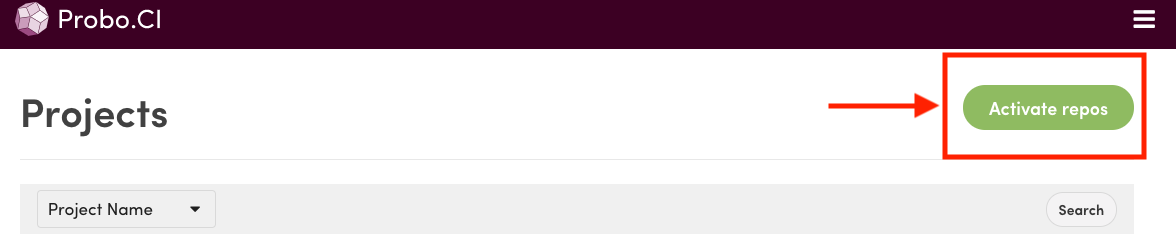
Click the “Activate Repos” button.
Then go to the repository of your GitHub repo and click the button next to the repo name to turn it on (it should turn green). If for some reason you don’t see your repo, click the “Sync Repos” button again to see if it appears.

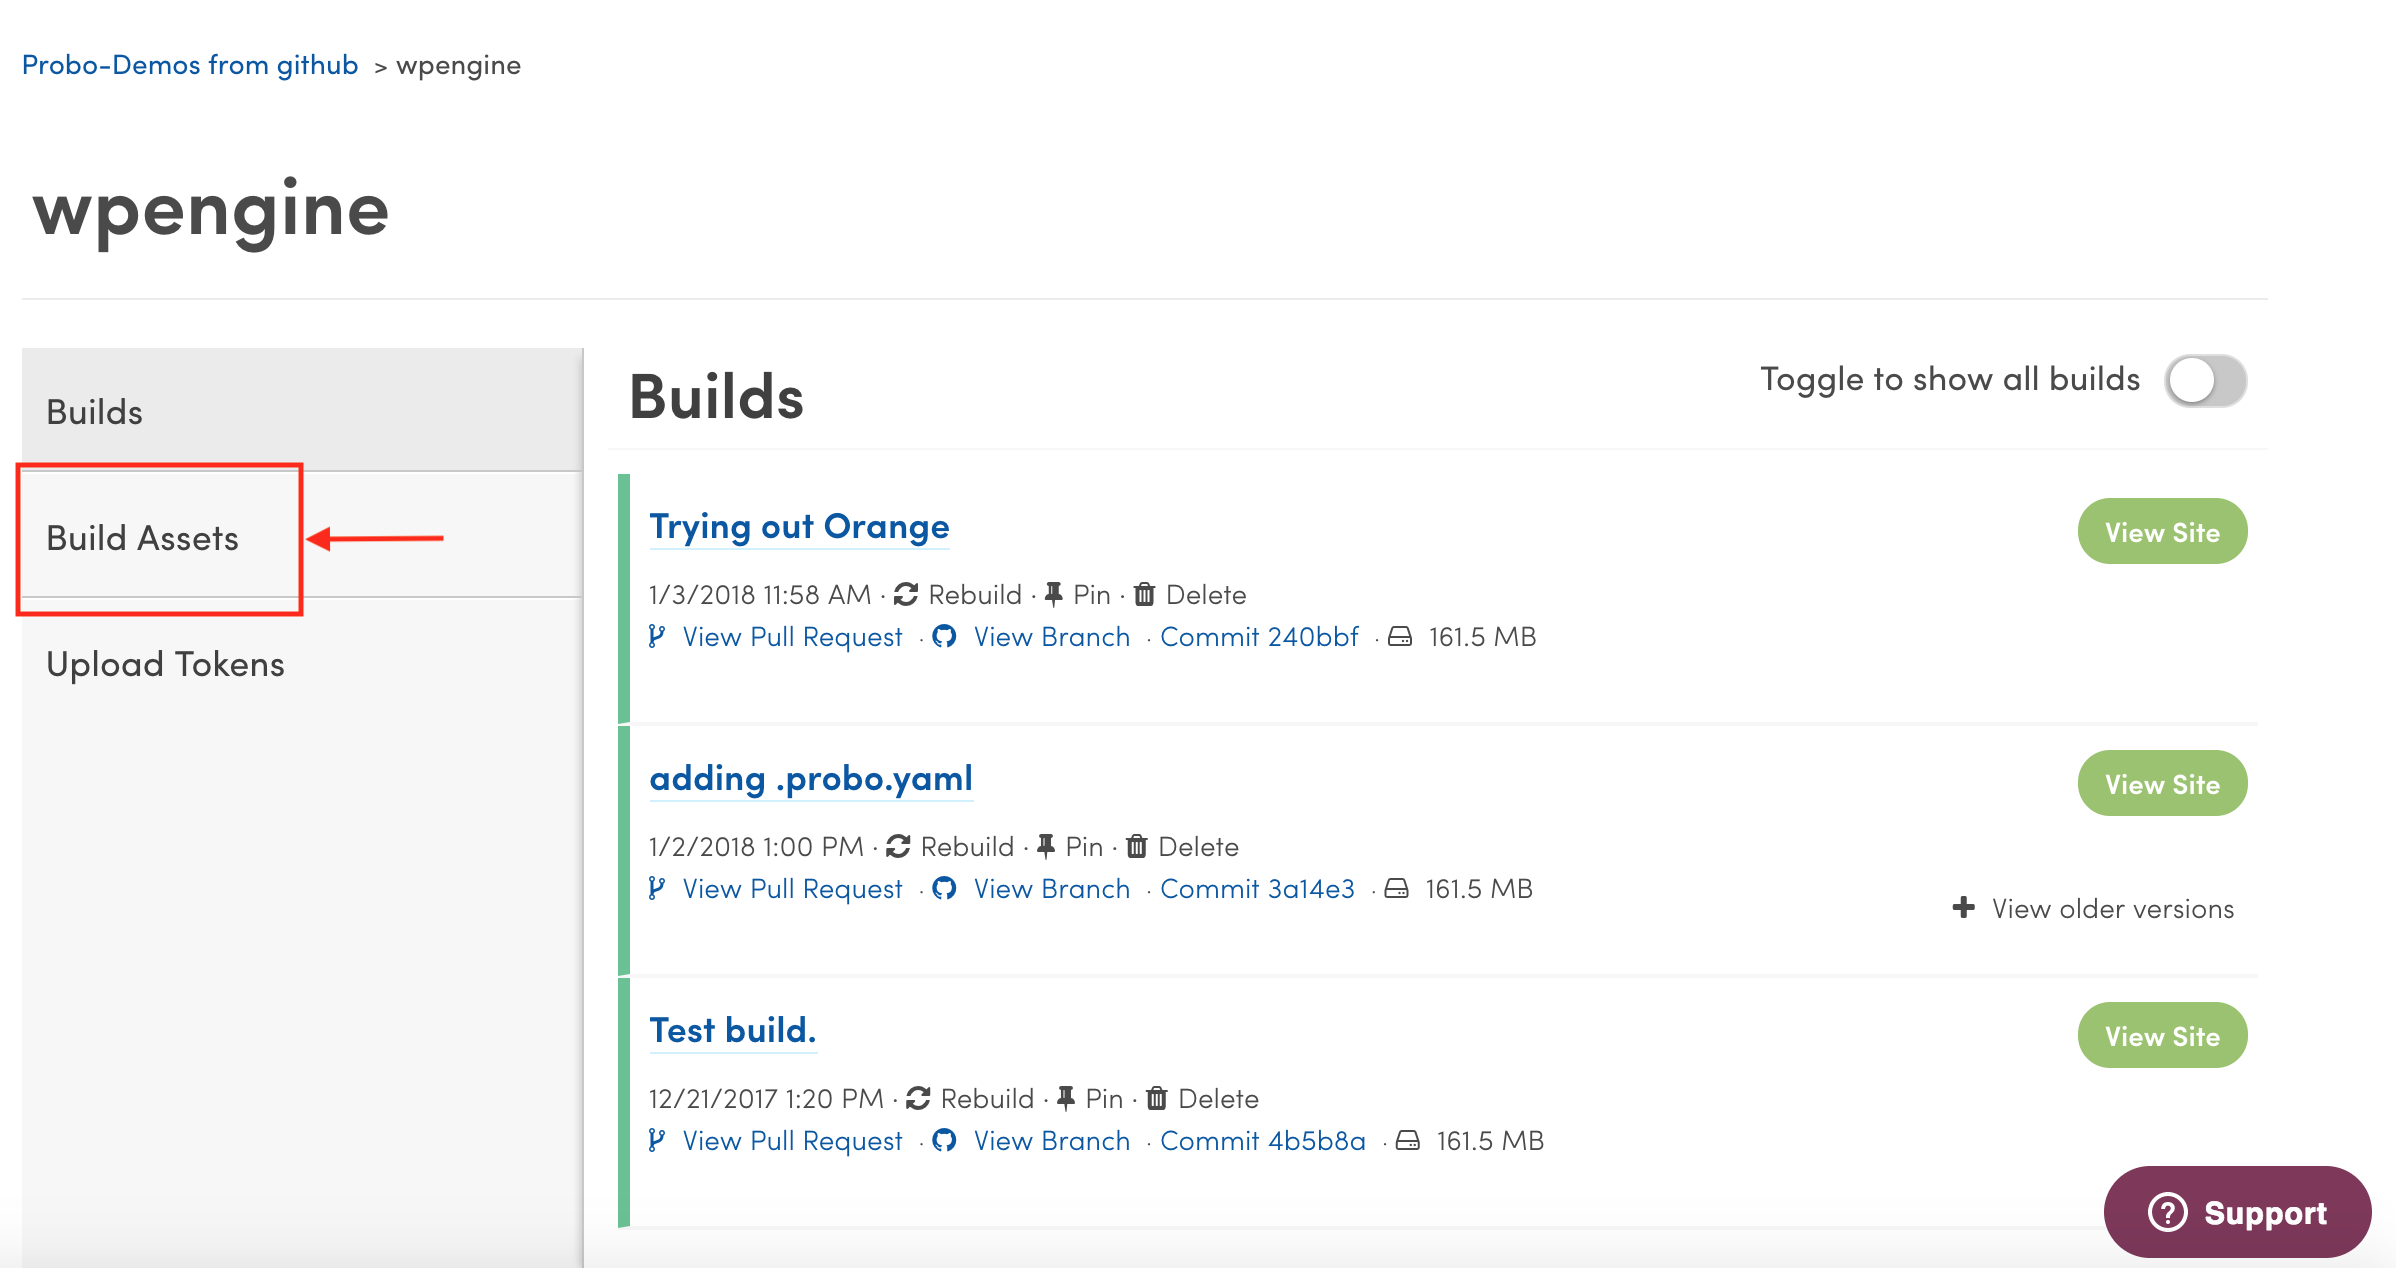
Click on the button next to the name of the enabled WPEngine repo, which should turn green to indicate it’s enabled. Then click “View Project.”

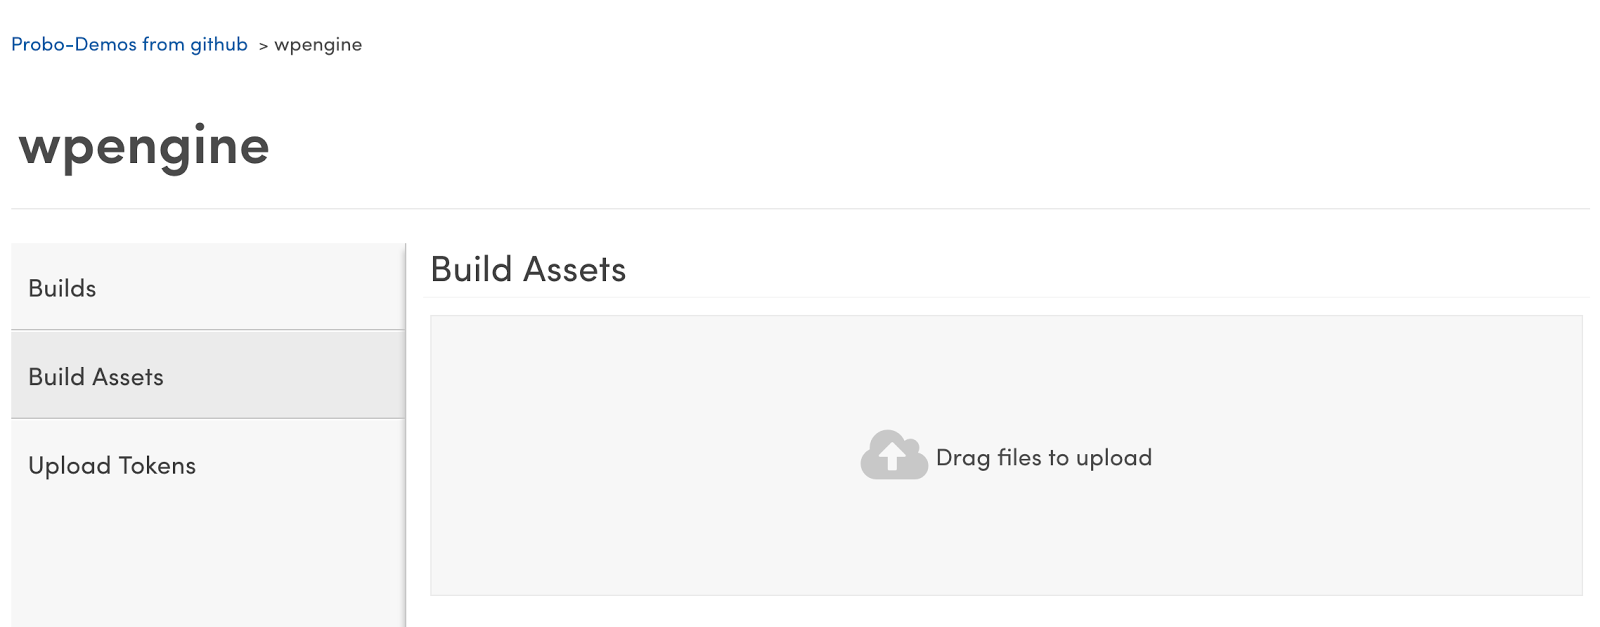
On the menu on the left side select “Build Assets.”
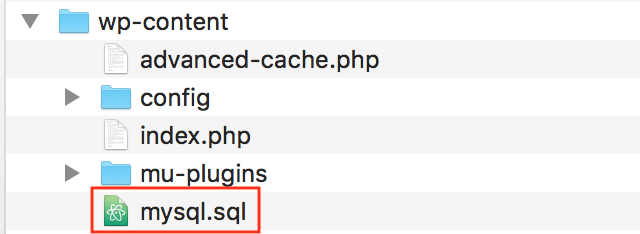
Next, find the database on your computer from the WPEngine backup you created in the first step, which should be located at /wp-content/mysql.sql.
Upload your mysql.sql file by dragging and dropping it into the window or clicking in the window and selecting the file from your file system.
Your Probo app should now be set up, but to see it in action you’ll have to make a change in your codebase and create a pull request. For more information on what a pull request is, please see: https://help.github.com/articles/about-pull-requests/.
Although the overall process was challenging for someone with my level of expertise, I now feel like I have a much greater understanding of all the tools involved.
I took my new understanding one step further and learned how to put the new site into action. I’ll walk you through this process in my next post, but if you have any questions in the meantime make sure to check out our resources or comment below.